Video Detection with AWS Rekognition
Introduction
Amazon Rekognition is a fully managed computer vision service that enables developers to analyze images and videos for a variety of use. AWS Rekognition provides a cloud-based pre-trained AI model that uses deep learning to analyze and extract information from images, videos, and text.
With the Rekognition API, it becomes much easier to build a solution that moderates content on your platforms. It offers a ready-to-use and wide range of computer vision capabilities, including object detection, text detection, image comparison, and much more.
Rekognition also becomes handy when building an automated identity verification system, with its image comparison API, it extracts features from images and matches them against one another.
Video Label Detection
Amazon S3 Configuration:
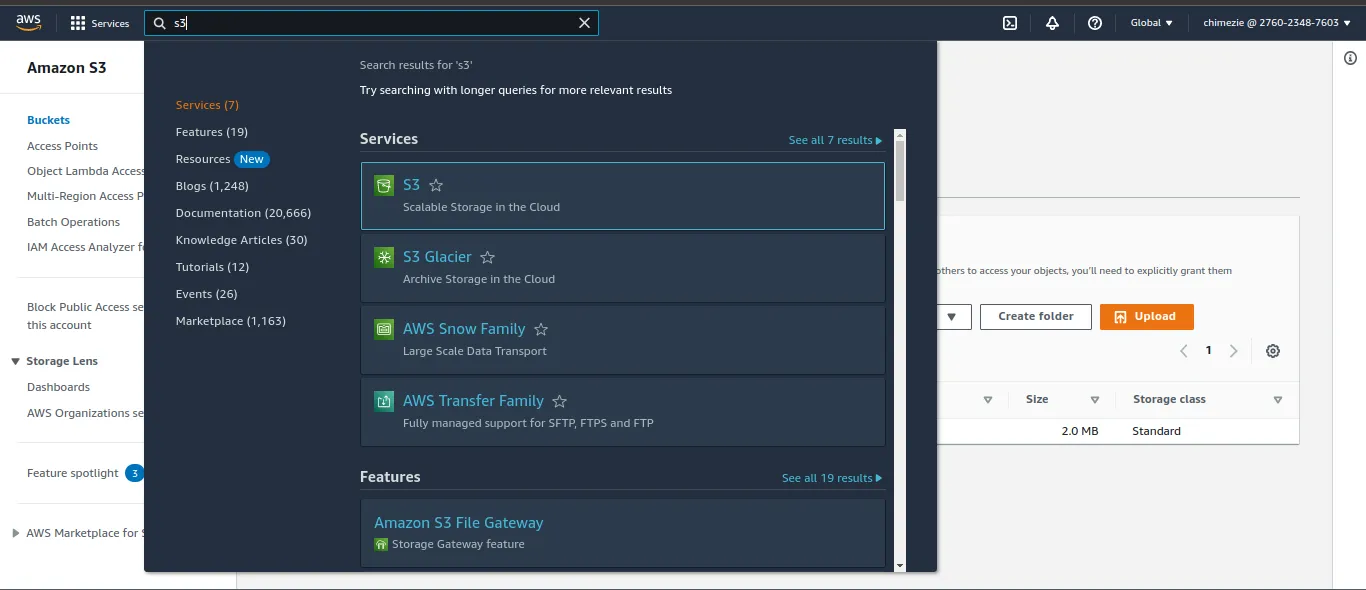
Before we begin our video analysis, we will first upload the video we want to analyze. To do that, go to the Buckets section in your Amazon S3. You can quickly navigate to your Buckets by searching for S3 in the Search bar at the nav section.
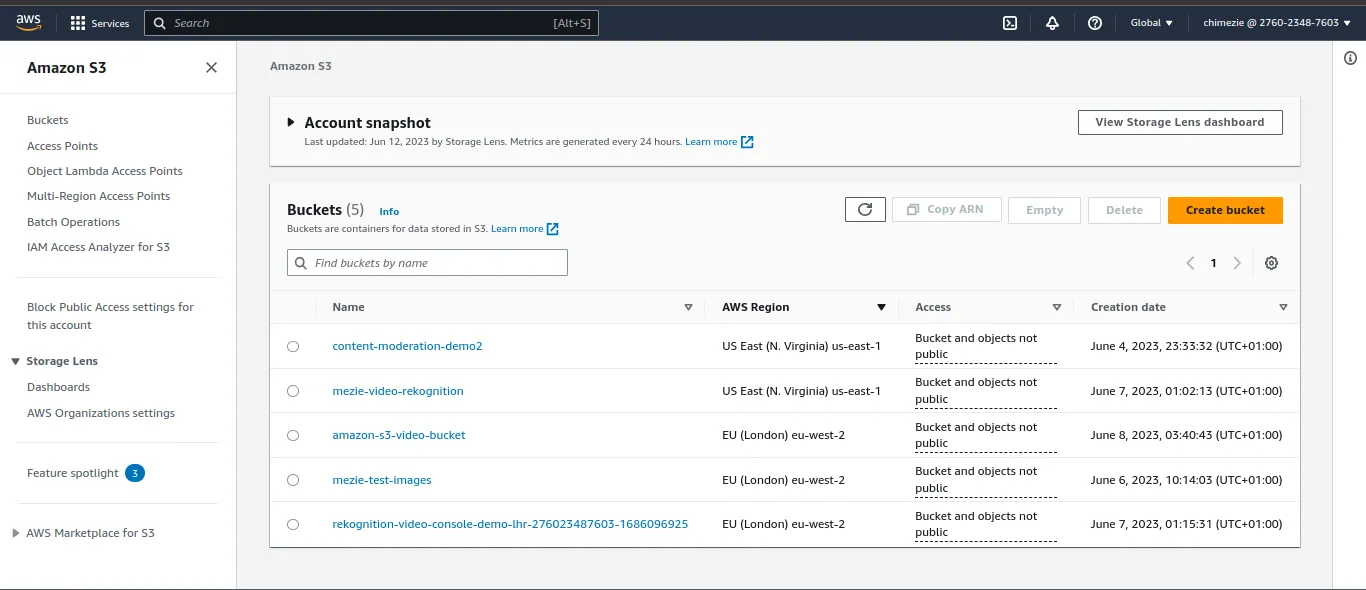
In your Buckets page, we will be creating a new Bucket called "Mezie-video-rekognition". You can name yours anything or decide to use an existing Bucket.
Next, we navigate into the Bucket we created and upload our video. Be sure to rename your video to a more easier-to-remember name. This is because we will be needing the video name and our Bucket name too.
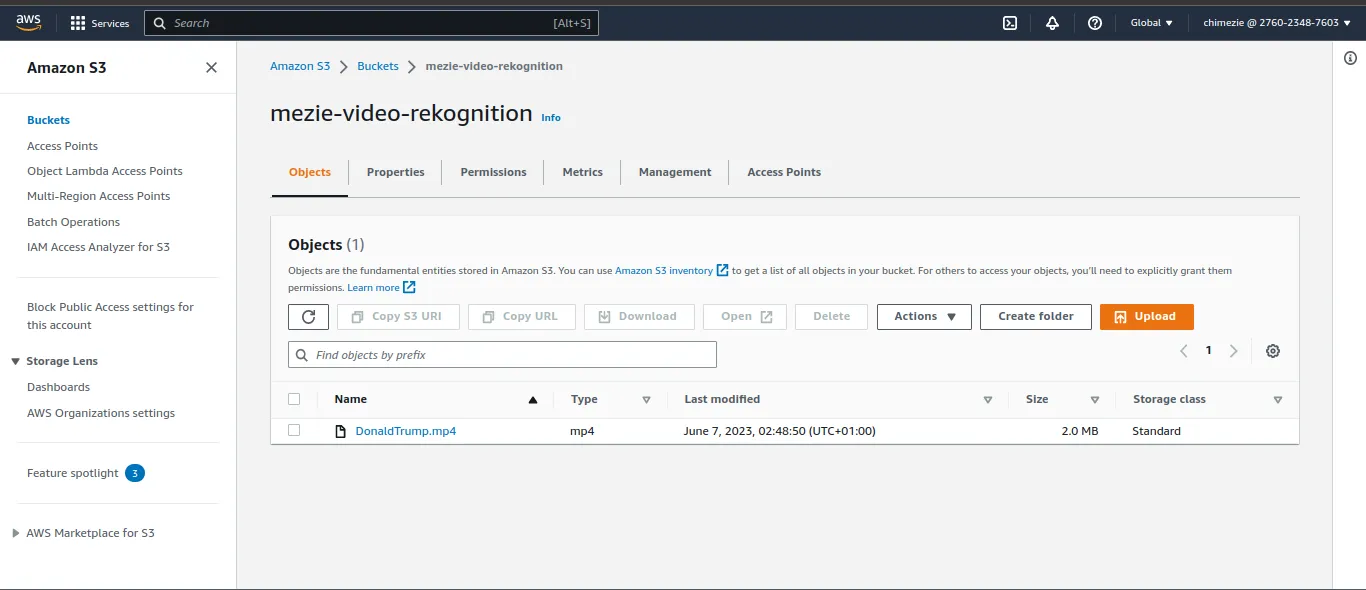
Amazon SNS Configuration:
After successfully uploading the video, we will then navigate to our SNS (Simple Notification Service) page to create an SNS topic. You can use the Search bar too for easier navigation.
The SNS is a service that allows message delivery from publishers to subscribers. It enables the easy creation, publishing, and consumption of messages or notifications to and from various endpoints or subscribers.
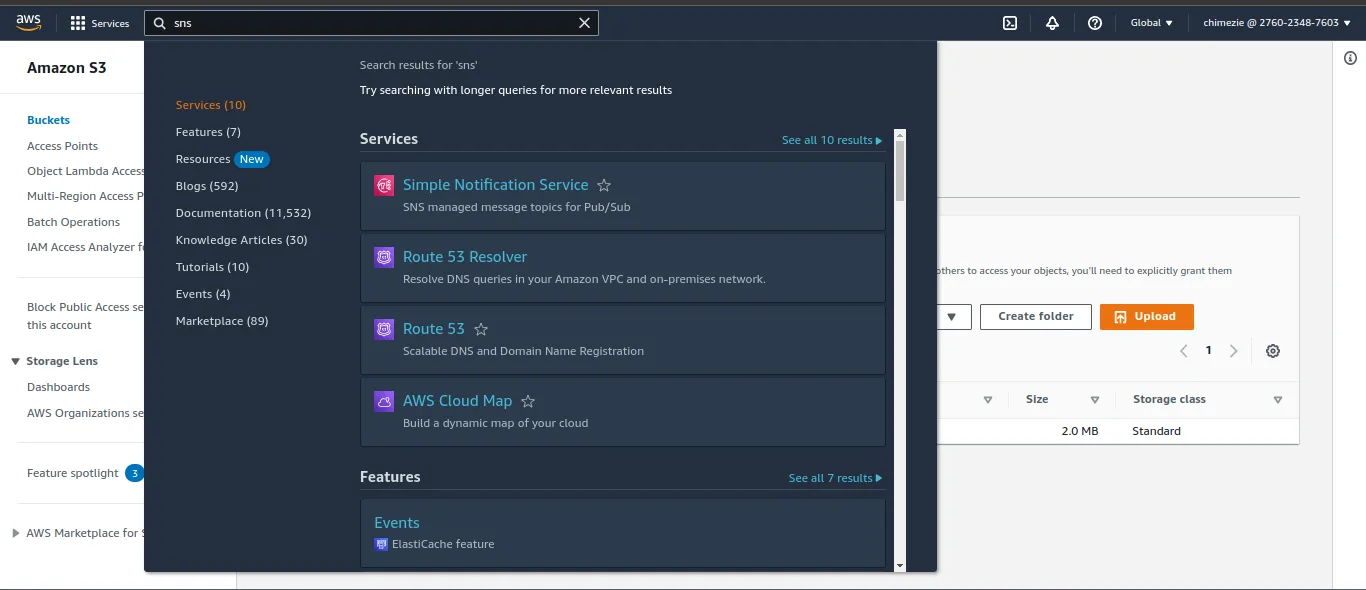
SNS allows us to send the results of the video analysis to an SNS topic. This then allows the analysis results to be easily consumed by other components or systems that are subscribed to the SNS topic. Use cases of this service will be alerting or sending an email message of the analysis report to the topic subscribers on completion of the analysis.
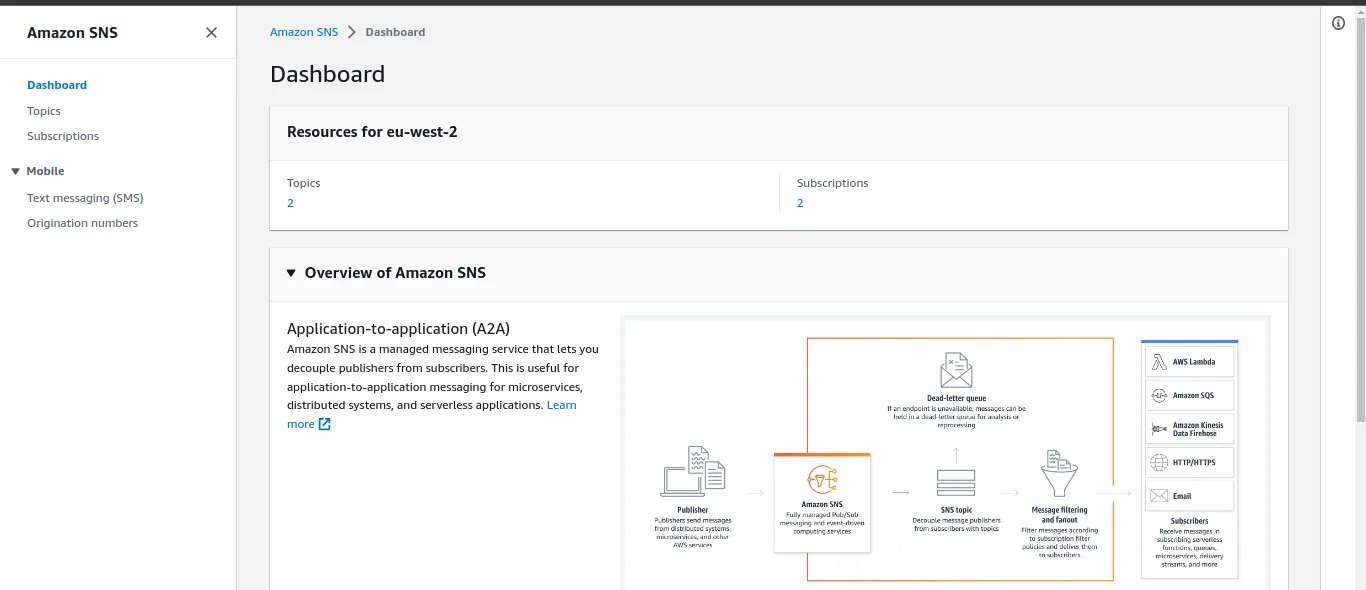
Inside the SNS page, select Topics as you will see the number of Topics available.
I’ve created a new Topic called AmazonRekognitionSNS.
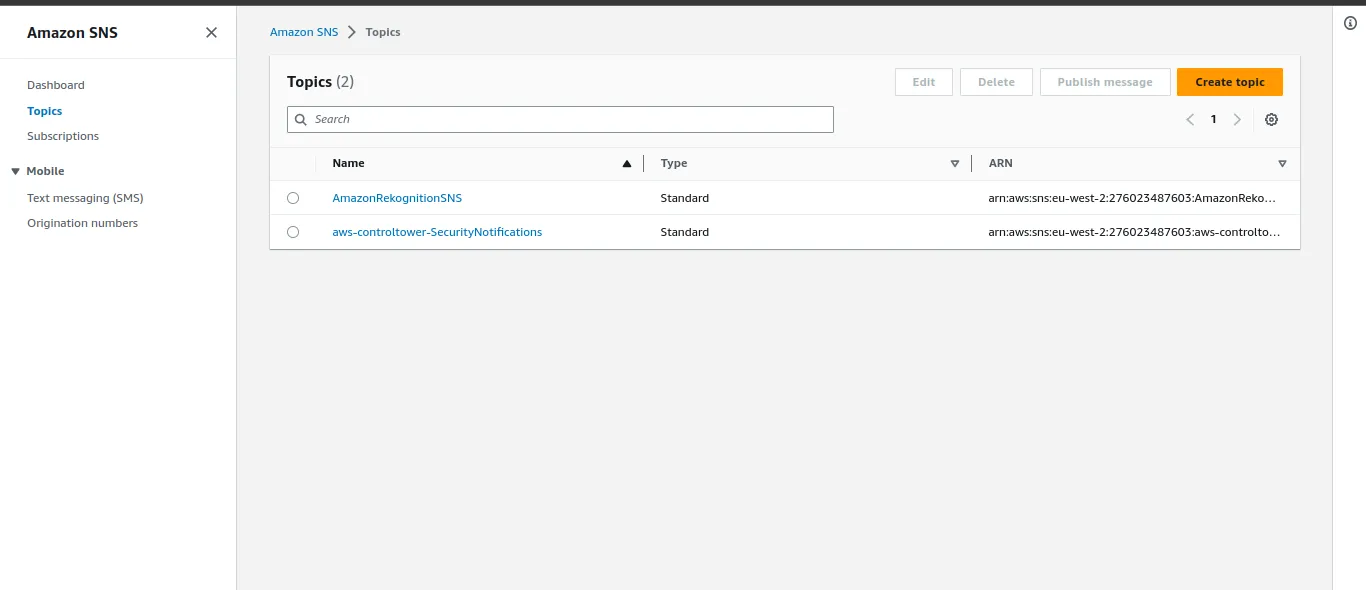
Navigate into the Topic and copy the ARN as we will need it for our analysis.

Amazon SQS Configuration:
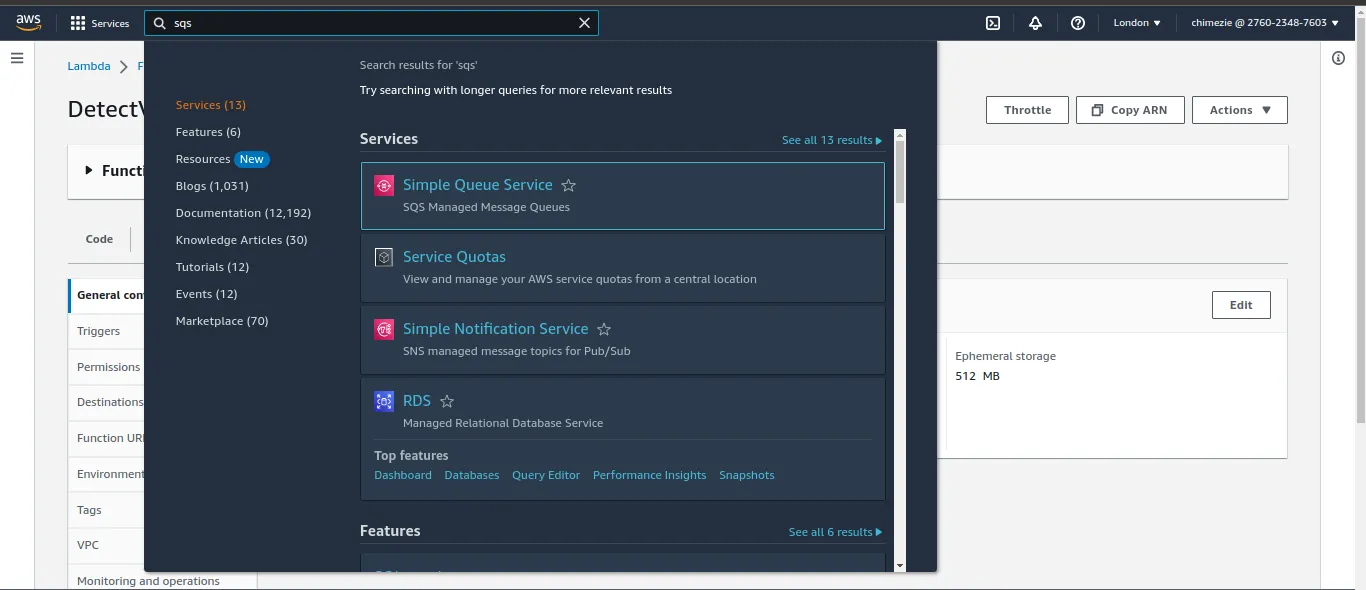
Next, we navigate to Queues located inside our Amazon SQS page.
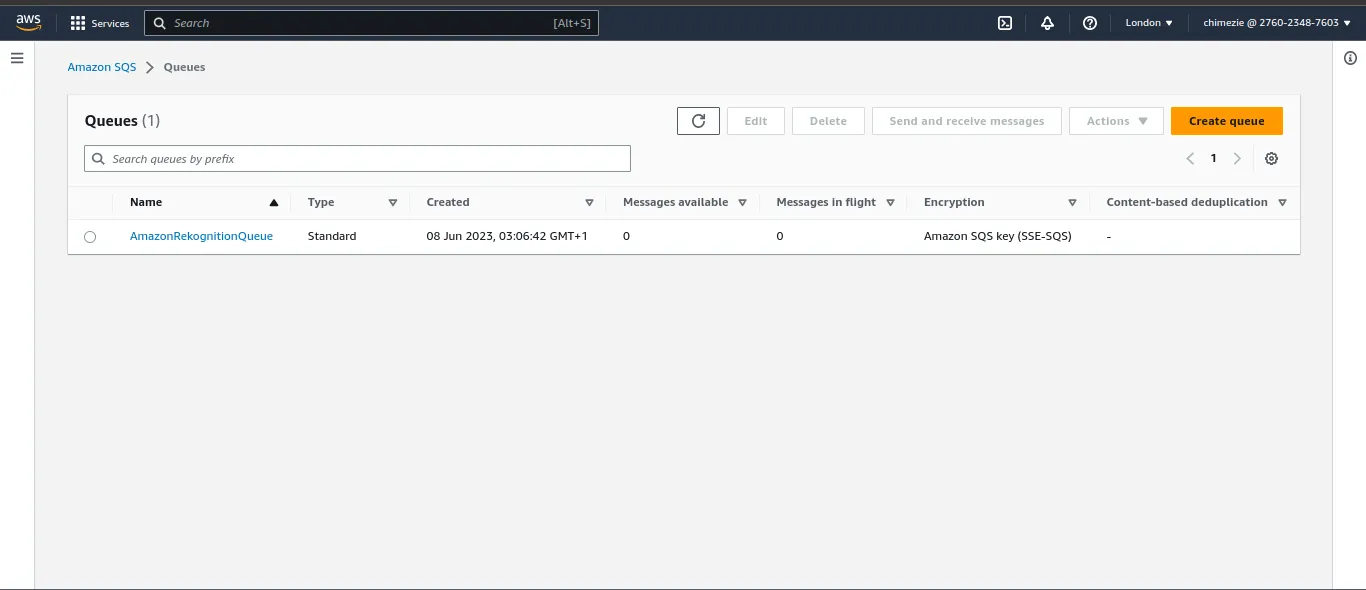
Inside the page, we will create a Queue. I’ve created one and called it “AmazonRekognitionQueue” See image below.
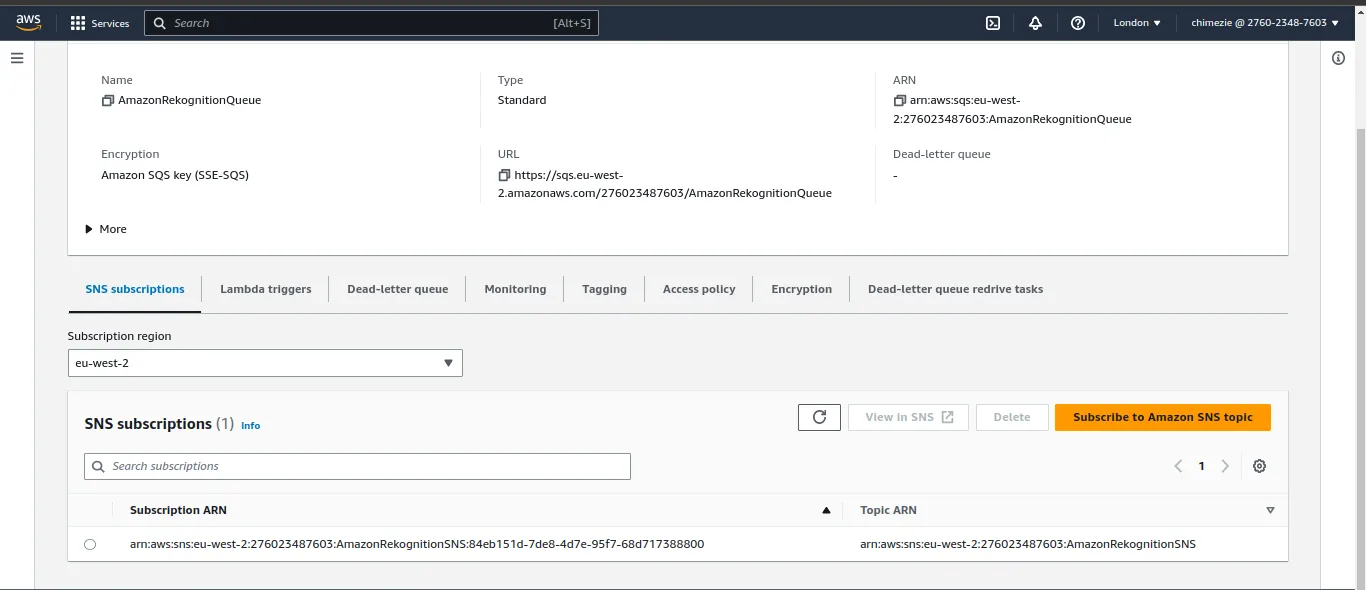
Navigate inside the created Queue (AmazonRekognitionQueue). At the bottom, you will find a “Subscribe to Amazon SNS topic” button. Click on it so we can subscribe to the Topic we created earlier.
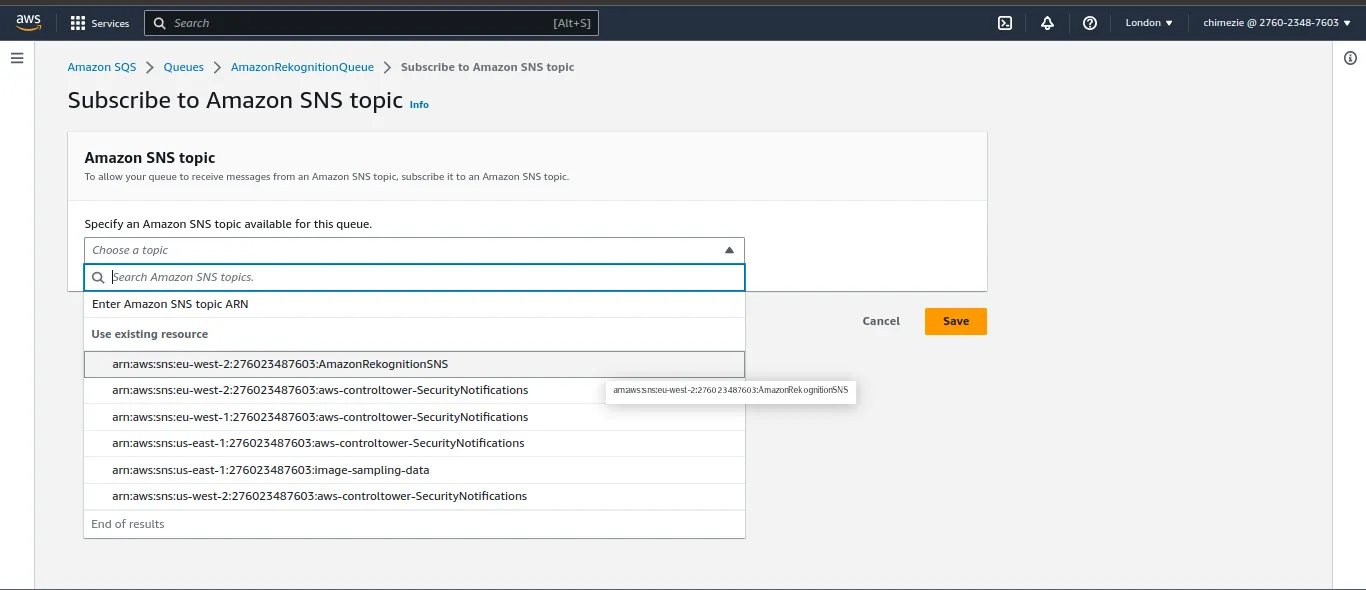
Click on the “Choose a topic” dropdown and select the ARN of the Topic we created. The ARN ends in the topic’s name so look for the one that matches your topic and subscribe to it.
See image below for clarity
After subscribing to the Topic, copy the ARN and URL of your Queue. You can find both at the Details section(located at the top of your Queue page).
Lambda Configuration:
Finally, we will be navigating to the Lambda page where we will be writing our codes and performing our video detection.
I’ve created a function called “DetectVideos” that runs in a Python environment.
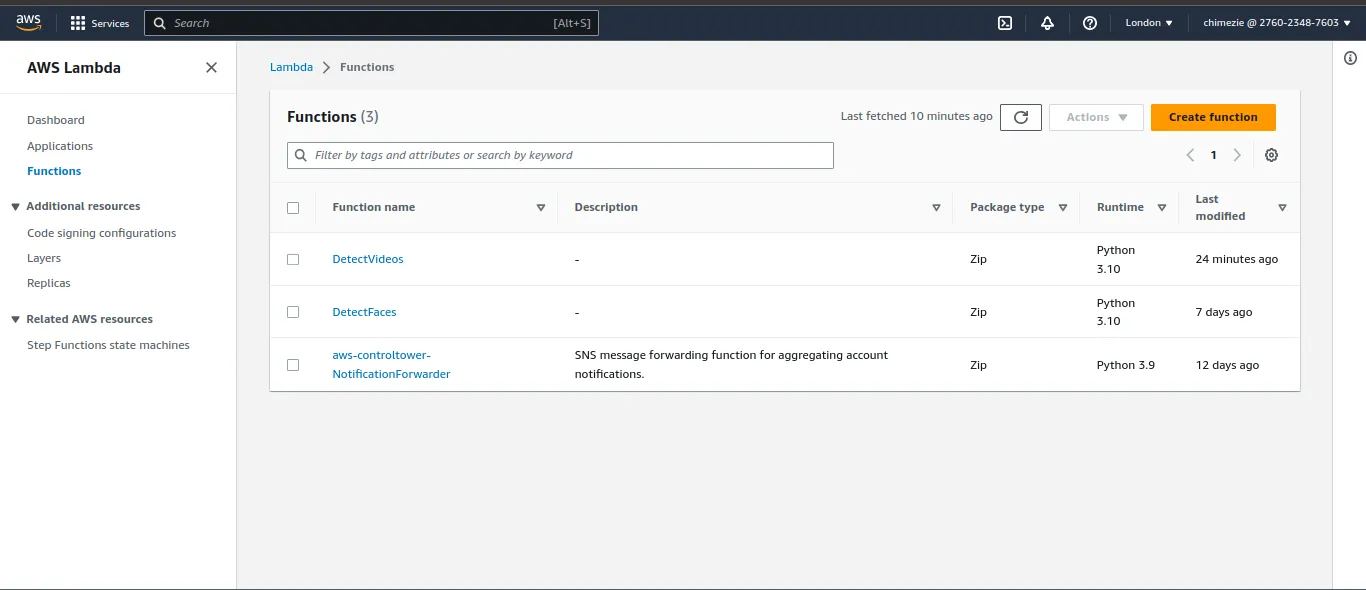
After navigating inside the function, go down to the Configurations section and choose Permissions.
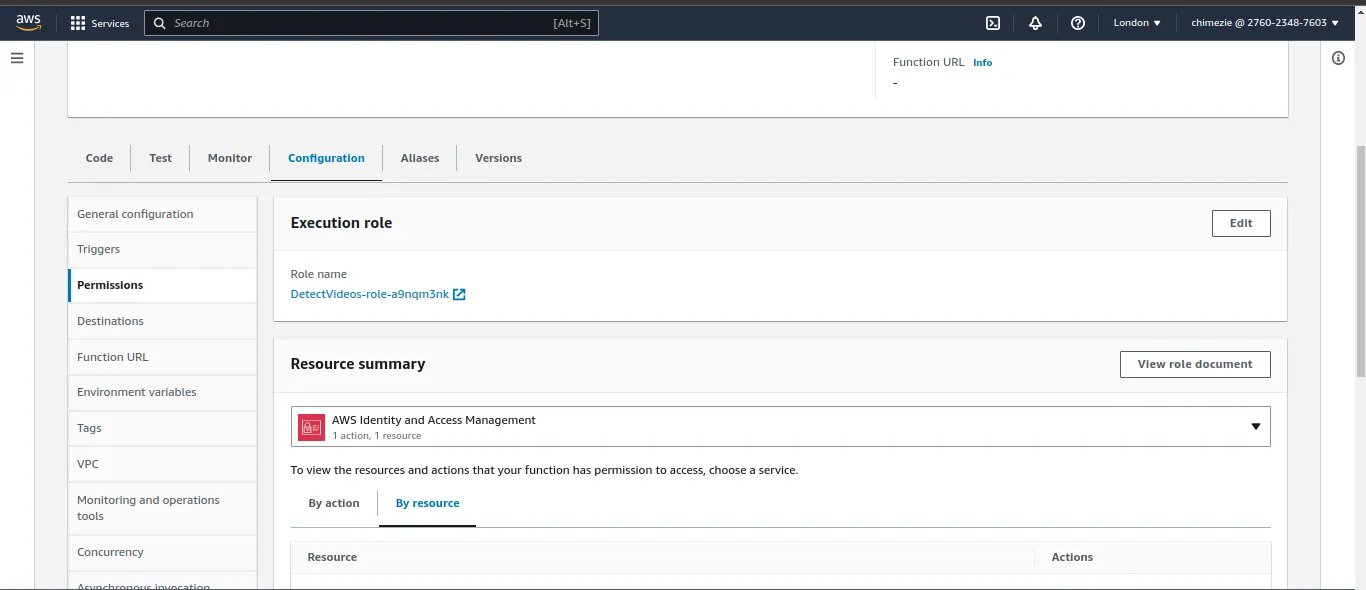
Click on the Role Name and you will be navigated to the IAM Roles page on another tab. We are going to be assigning certain roles to the user so that we can be able to perform the video detection analysis. These roles include AmazonRekognitionFullAccess, AmazonSQSFullAccess, and so on.
In the Permissions Policies section, click on the “Add Permissions” button seen on the right side and then “Attach Permissions”.
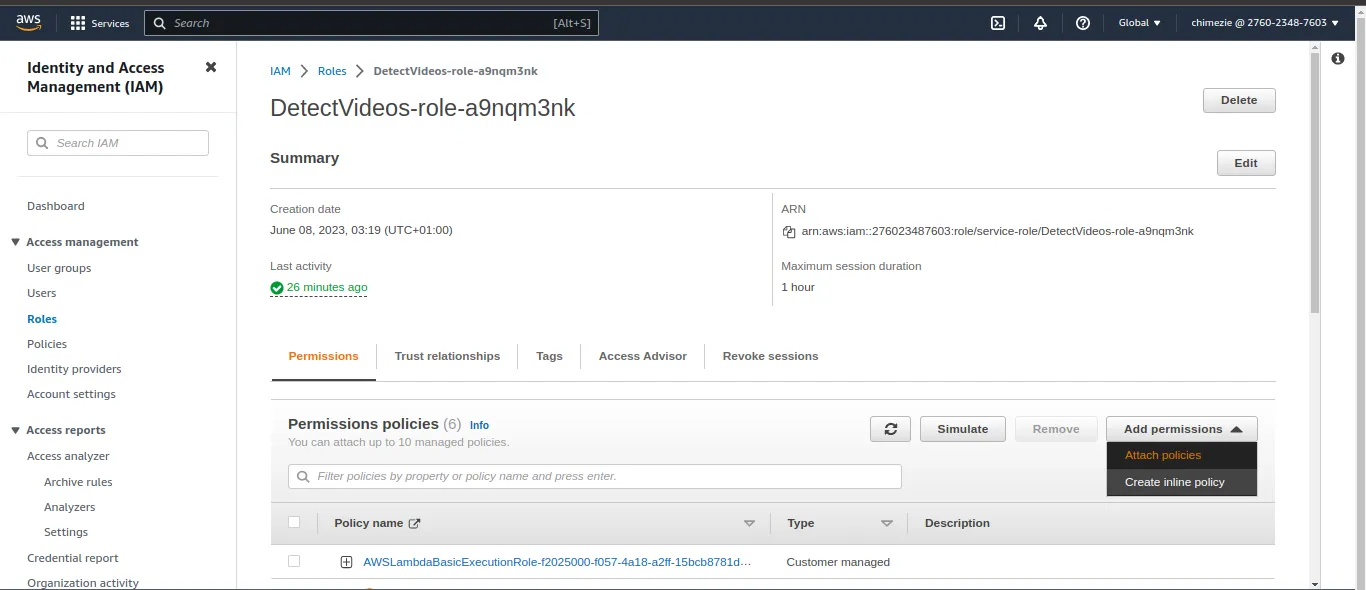
We are going to be adding the following permissions: AmazonRekognitionFullAccess, AmazonS3ReadOnlyAccess, AmazonSQSFullAccess, and AmazonRekognitionServiceRole.
For the last permission, we will be creating a custom policy. This is to add a permission that isn’t available. This permission “rekognition:StartLabelDetection” allows us to start our label detection analysis for our videos.
To add the custom permission, click on the “Add Permissions” button and this time, click on the “Create Inline Policy” button instead. Select JSON and paste the code below;
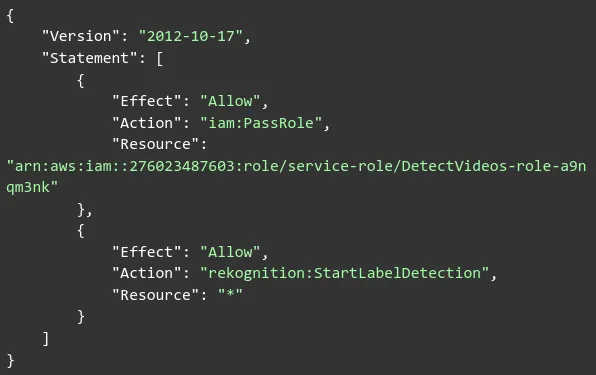
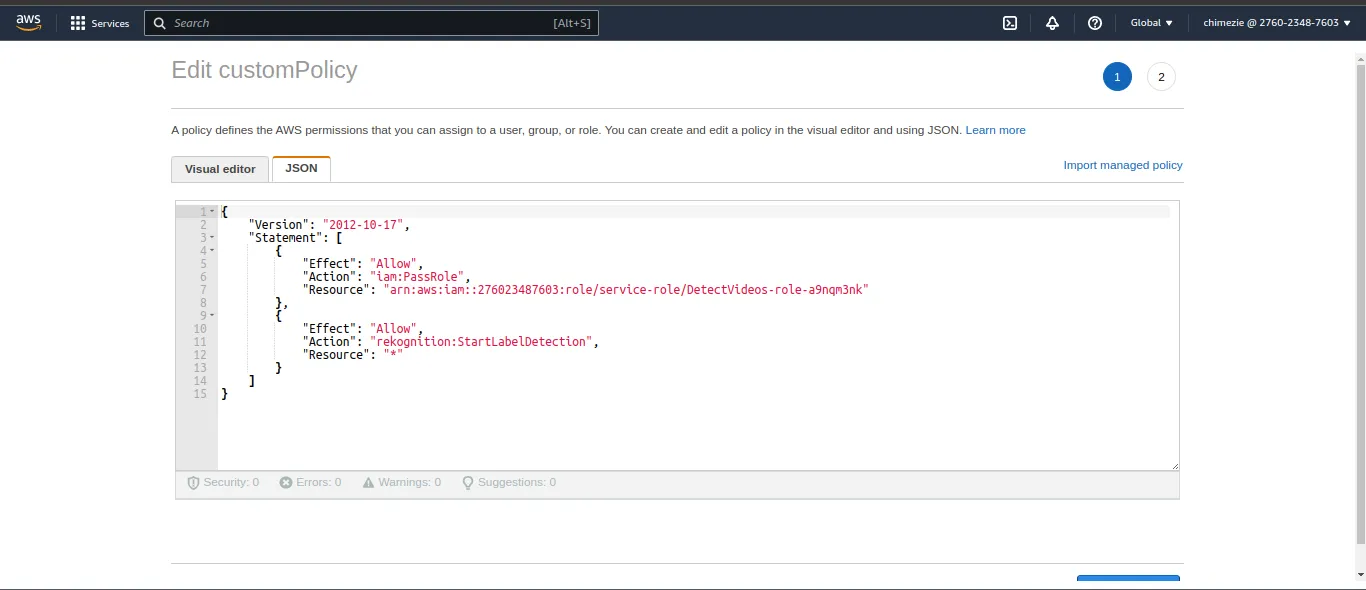
Review policy and save. You should have these permissions as your preferred permissions.
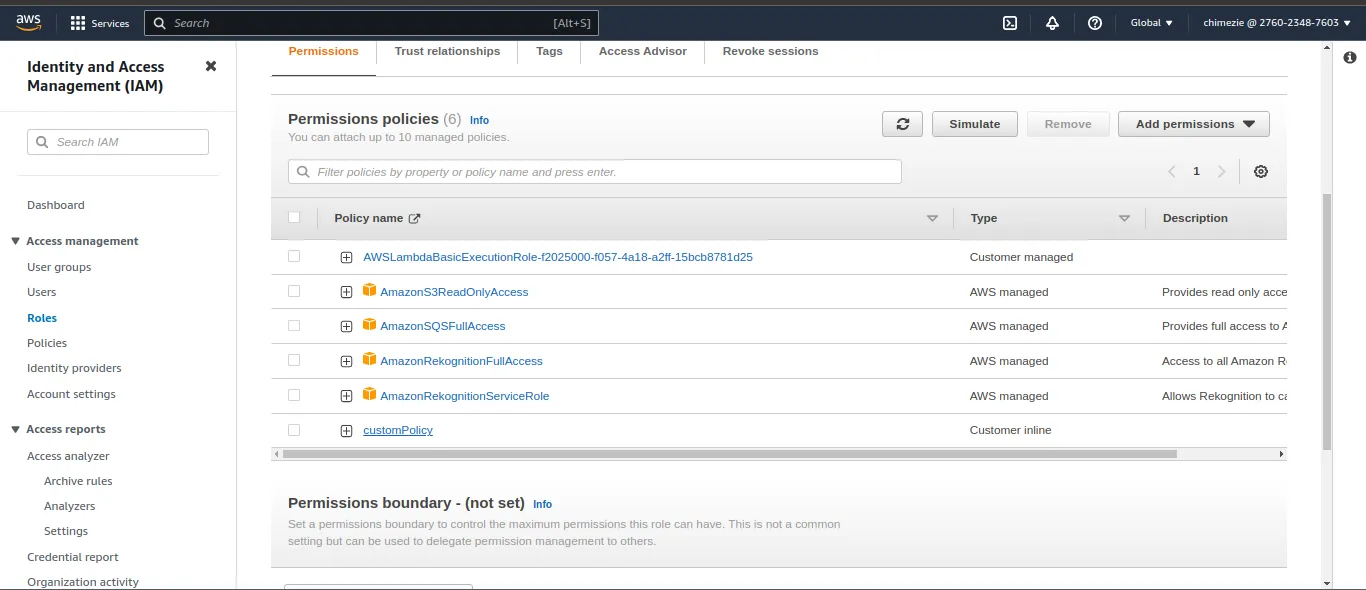
Copy your role’s ARN. You can locate it at the top of the page (Summary section). Then, go back to the Lambda’s home page and select the Code section so we can begin writing our code.
In your lambda_function.py editor, copy and paste the code below;
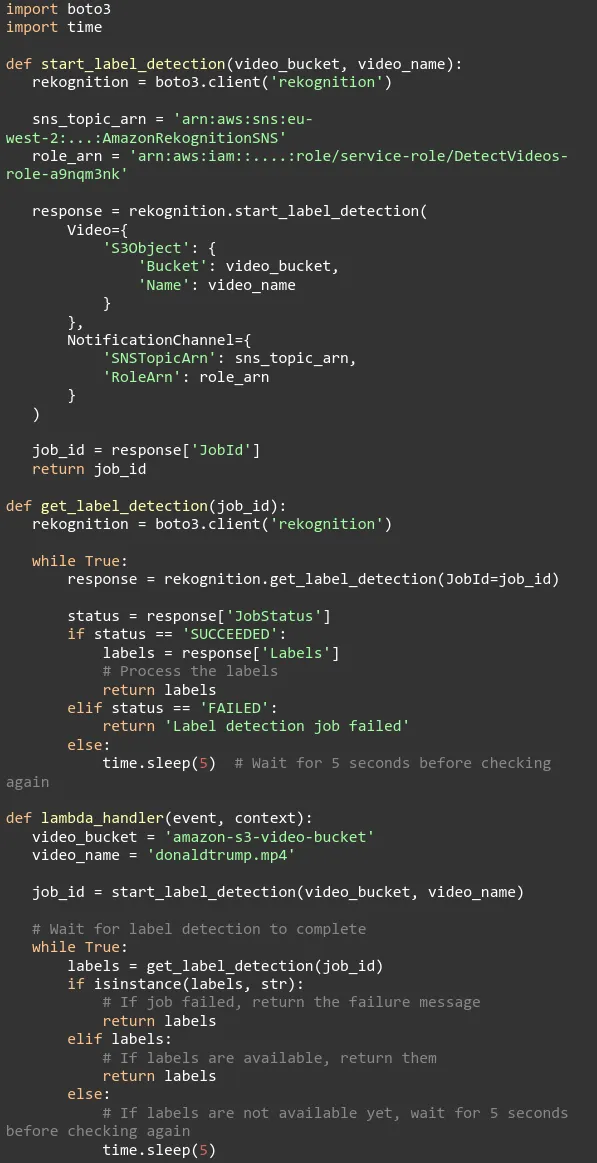
Change the video bucket and video name to yours. Also, replace the SNS topic name and Role’s ARN to yours. Deploy your code and test.
Note: Lambda's default execution time is less than 3 secs so your test might not complete (test will timeout) before the video has been fully analyzed. To fix this, go over to Configuration, select General configuration and then change the timeout to a longer time to allow the function to run and complete the analysis.
Celebrity Detection
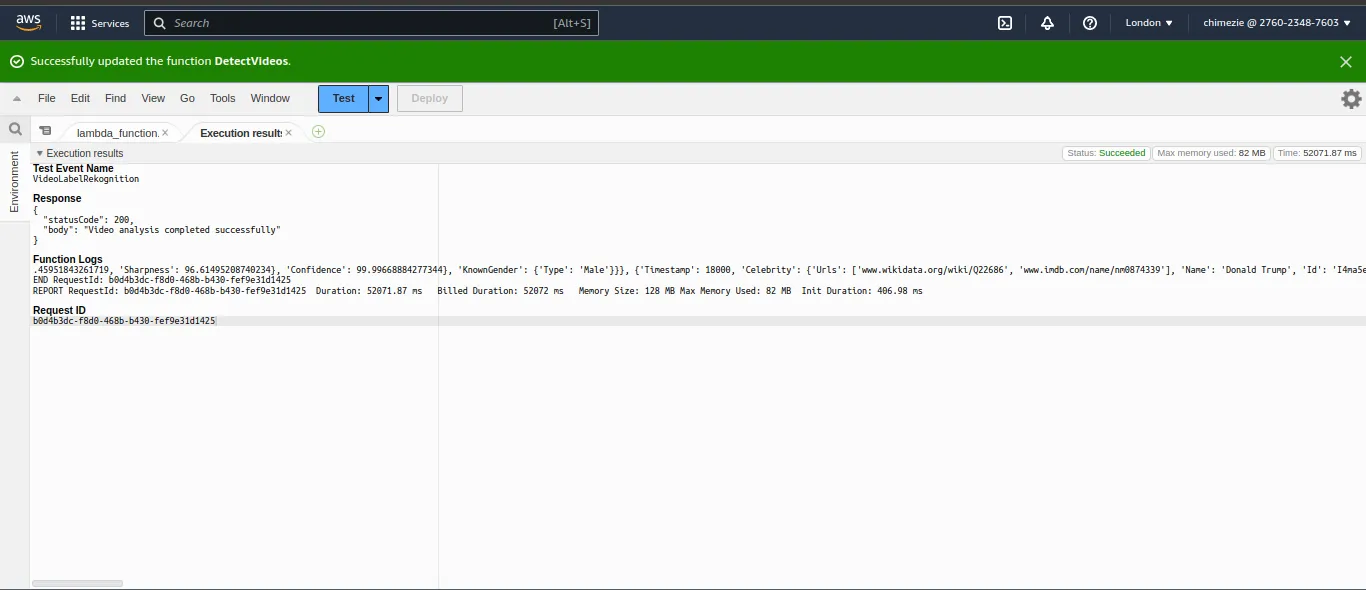
We can also perform Celebrity detection in our lambda. Amazon Rekognition provides us with an API called start_celebrity_recognition and get_celebrity_recognition that allows us to detect which celebrity is in our video.

In this case, it ran and detected Donald Trump as the celebrity present in the Video with a confidence of 99.
