How to Deploy and Host Your Web App on AWS Amplify
By abdulmumin yaqeen
on February 7, 2024

Introduction
AWS Amplify is a powerful service that simplifies the process of deploying and hosting web applications. With its ease of use and integration with various frontend frameworks, deploying your app becomes straightforward. In this tutorial, we'll walk through the steps required to deploy a web app using AWS Amplify.
Step 1: Sign in to the AWS Management Console
Navigate to the AWS Management Console and sign in to your AWS account. If you don’t have an account, you'll need to sign up.
Step 2: Access AWS Amplify Console
- Once logged in, search for "Amplify" in the AWS services search bar.
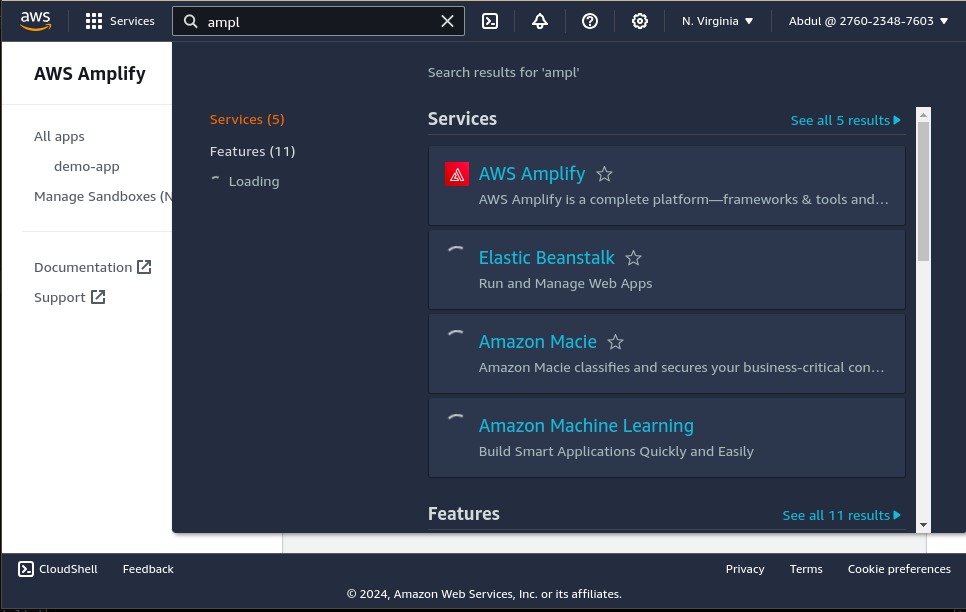
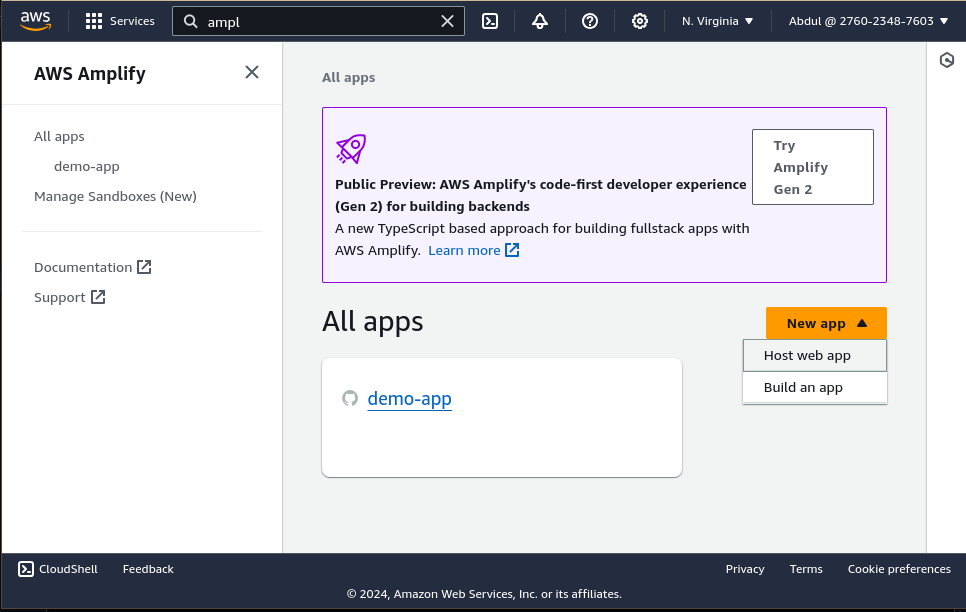
Step 2: Click "New app" button and choose host a web app
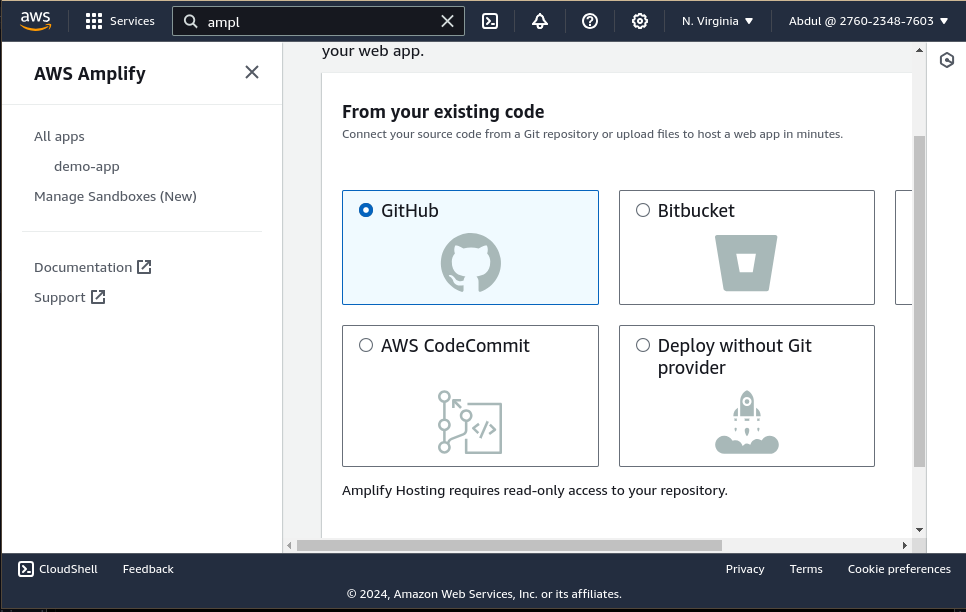
Step 3: Choose the platform your code is hosted
Select your preferred Git provider (GitHub, Bitbucket, GitLab, or AWS CodeCommit). In our case, we will be using Github. Choose and click continue.
Step 4: Authorize Amplify
Authorize AWS Amplify to access your repository.
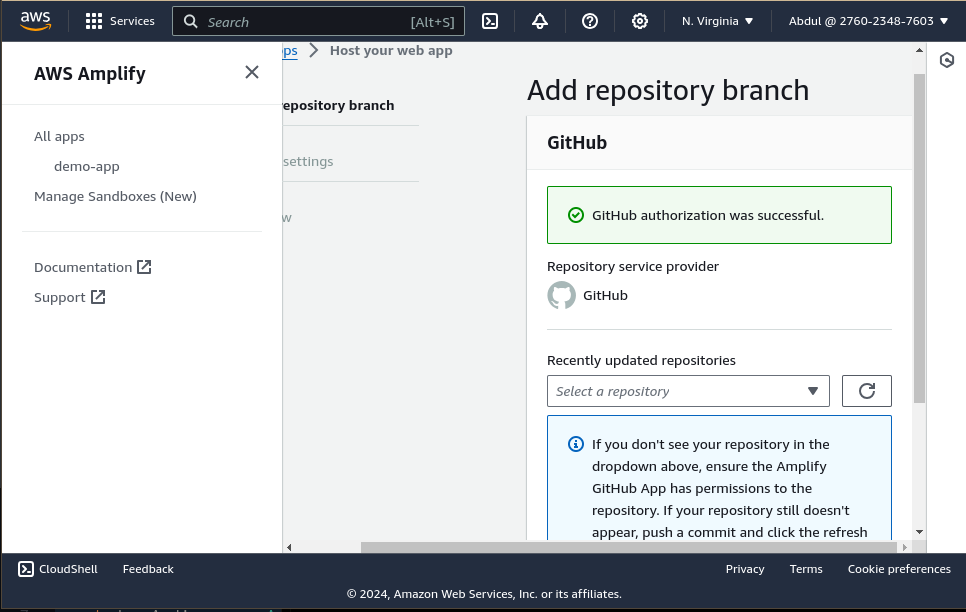
- Choose the repository and branch that contains your web app code.
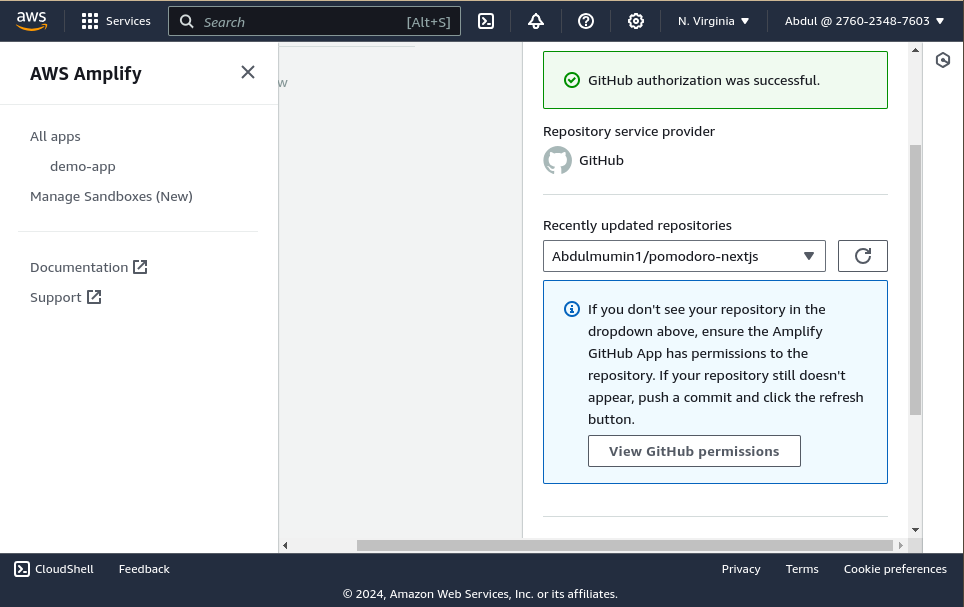
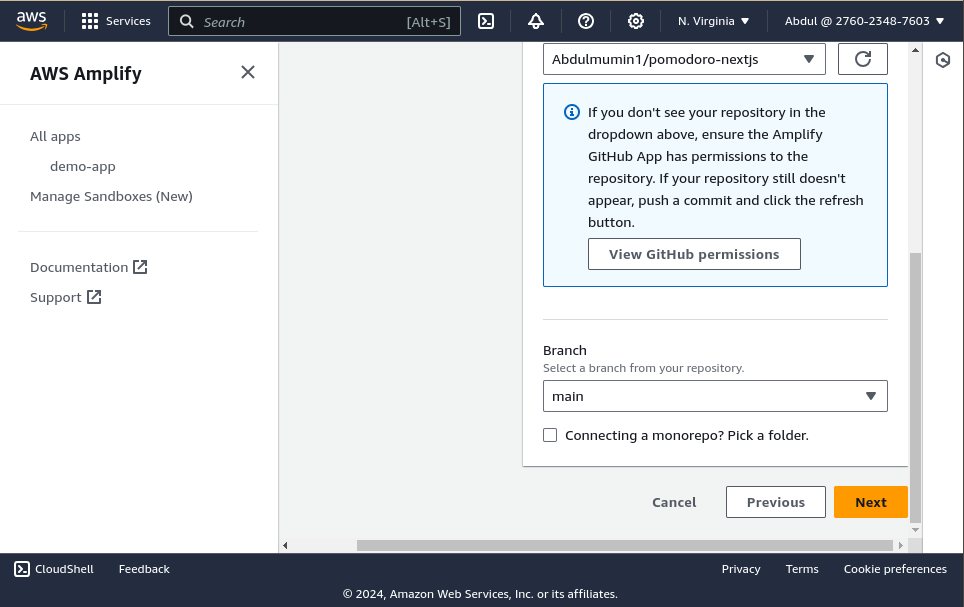
- Click "Next."
Step 4: Configure Build Settings
- Define your build settings:
- Select the framework or environment of your app (React, Angular, Vue.js, etc.).
- Configure the build settings like build commands, output directory, etc.
- Click "Next."
Framework and build settings can be auto detected, this steps can be skipped if it does.
Also, if you require a custom build setting, In your project root, you can add a amplify.yml where your can have something like this:
version: 1
frontend:
  phases:
    preBuild:
      commands:
        - npm ci
    build:
      commands:
        - npm run build
  artifacts:
    baseDirectory: out
    files:
      - "**/*"
  cache:
    paths:
      - node_modules/**/*
Step 5: Review and Deploy
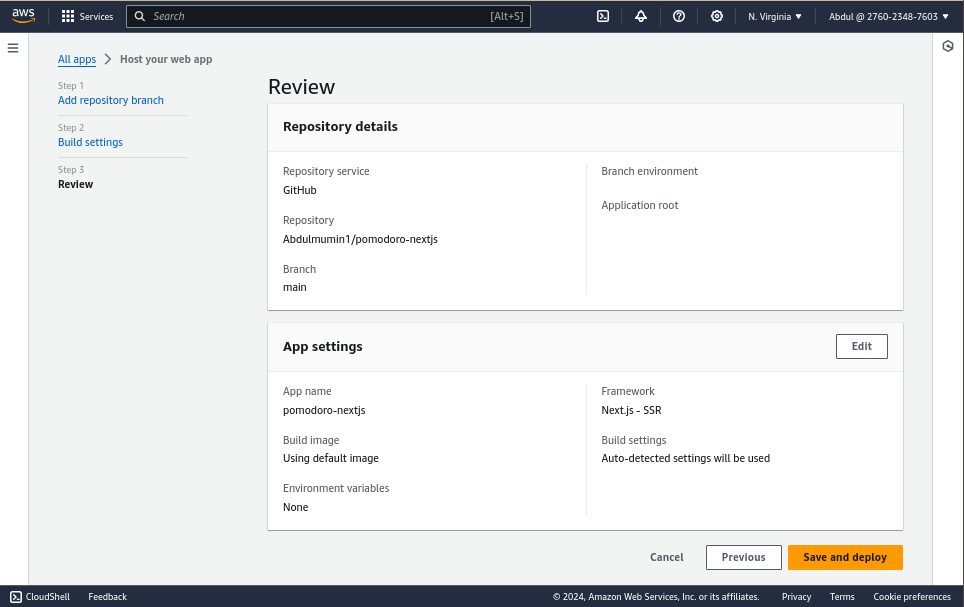
- Review the settings to ensure they're correct.
- Click "Save and deploy" to trigger the deployment process.
Step 6: Monitor the Deployment
AWS Amplify will start the deployment process. You can monitor the deployment progress in the Amplify Console. It will automatically build and deploy your app based on the configuration you provided.
Step 7: View Your Deployed App
Once the deployment is completed successfully:
Here is our pomodoro site built with nextjs

- Click on the link provided in the Amplify Console to view your live web app.
- Ensure everything looks and works as expected.
Step 8: Set Up Custom Domains (Optional)
If you want to use a custom domain for your app:
- In the Amplify Console, go to "Domain management."
- Follow the instructions to add and configure your custom domain.
Step 9: Continuous Deployment (Optional)
AWS Amplify supports continuous deployment, allowing automatic updates whenever you push changes to your repository:
- Enable the "Continuous deployment" option in the Amplify Console.
- Choose the branch to monitor for changes.
- Any new commits to that branch will trigger automatic redeployment.
Congratulations! You've successfully deployed and hosted your web app on AWS Amplify. Remember to manage your app settings and monitor its performance regularly through the Amplify Console.
Customize your deployment settings further based on your app’s specific requirements. AWS Amplify offers a variety of features for scaling, monitoring, and managing your applications, making it a robust choice for hosting web apps.